Overwolf Events Recorder and Player (ERP)
This article describes the Overwolf events recorder and player tool. Use this tool to test the APis that you want to use in your app.
The Overwolf Events Recorder allows Developers to record important API Events/Calls that happen to them in real time. These recordings can then be used by the Events tester to mimic the exact state of the game, and ensure that your app reacts to it properly. The tool is designed to be run without the game and replicate in game scenarios.
* For more information, see Supported APIs.
Getting started
To get started with the Game Events Recorder, you must first obtain the latest build.
To build the latest version locally:
- Download the Events recorder and player.
tip
Clone this repository to keep your local copy up to date.
- Make sure you are in the
ow-events-recorderfolder and install dependencies using your installed package manager. For example, runnpm i. - Run
npm run buildto build the application. - Once the
buildcommand finishes running, use thedist/to load the app into your Overwolf client as unpacked extension. - Press Launch to start the app.
Using the app
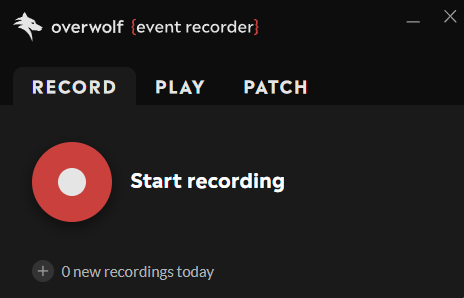
When you launch the app, you should see the following screen:

Recording events
Press the Start recording button and any API events/calls from the supported list will be recorded.
When you are ready to stop recording press the Stop recording button.
The bottom of the app will display the number of new recordings. Press the + new recordings today button to show the recordings. Press the title of the recording to change the name (default is untitled), or hover over the title to display the edit and delete icons. Recordings are saved to Documents/overwolf-erp/ folder.
Use this recording in [Overwolf Events Tester][events-tester] to see how your app would act in the recorded event sequence.
You don’t need to perform any configurations to make recordings. Make sure to start recording before you launch a game, and close the game before you stop recording. This will ensure that all the events are saved.
Testing events in your app
Preparing the client app
You can use the ERP to test events in your app. You app will be referred to as the client app. You need to prepare your app in order to test it with the ERP. Use one of the following methods:
- Using the ERP
- Manually
- Press the Patch tab
- Drag your
.opkorunpacked appdirectory into the window. This processes the client app automatically and opens an Explorer window with the prepared client app.
- Prepare the client app manually.
-
The client app needs to be unpacked in a directory and loaded from there, using Load unpacked extension option in the Packages window of your Overwolf client. ::: note You can't use an app that was loaded as an
.opkas a client app. If you want to use an.opkfile, then unpack it and use that folder or the folder where the app's files were installed. ::: -
Open the app’s
manifest.jsonand find all instances of "in_game_only": trueand change them to"in_game_only": false. This is needed so that the in-game windows of the app can show up on the desktop while playing a recording. -
Get
js/player.jsandjs/player.js.mapfrom Overwolf ERP’s directory and copy them into the same directory with the background controller.htmlfile. -
Open the app’s background controller
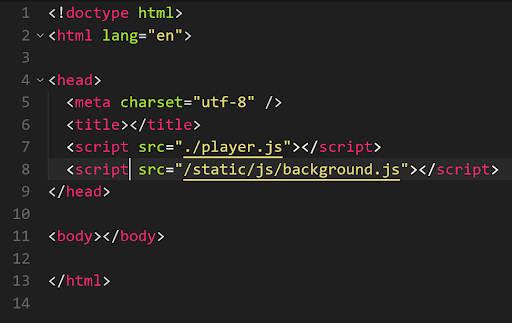
.htmlfile. It is specified in manifest.json in the start_window property. Then, edit the file and paste<script src="player.js"></script>before all other<script>or<link>tags. For example: You can also import
 player.jsat the beginning of your background controller’s code to load the library. -
On the Play tab, set the client app’s
UID. You can get it from the Packages window in your Overwolf client.noteIf you have a different version of the same app you will need to uninstall it first.
-
Load the client app (from the directory) to receive events from your recordings.
noteA patched app will have the “(Overwolf ERP Patched)” prefix in its description.
noteThe player library will only run and affect events in the background controller window (set as
start_windowin themanifest.jsonfile). If you try to use GEP or GameInfo events in other windows, they will not receive events or callbacks from the recording. -
Verify that your client app is receiving events by checking the client app’s background controller window console. You should see a message saying Event Player: ready.
Playing events and calls
To play a recording:
- Add a client app's UID to the Client app pane, then press Set. If you want to change the client app, press Set client and enter an new UID.
- Select a recording from the recordings list.
- When ready, press the Play button.
Supported APIs
The Overwolf Events Recorder includes the Overwolf APIs* listed below.
Only Overwolf APIs are supported. Some third party APIs may not be available, or might be in an incorrect state when you play a recording. This can result in the client app not behaving like it would in a normal game session, lead to error states, or the client app not working at all.
Supported API events
The following events can be recorded and then played back:
overwolf.games.onGameLaunchedoverwolf.games.onGameInfoUpdatedoverwolf.games.events.onInfoUpdates2overwolf.games.events.onNewEventsoverwolf.games.events.onErroroverwolf.games.launchers.onLaunchedoverwolf.games.launchers.onUpdatedoverwolf.games.launchers.onTerminatedoverwolf.games.launchers.events.onInfoUpdatesoverwolf.games.launchers.events.onNewEvents
Supported API calls
overwolf.games.getRunningGameInfo()overwolf.games.getRunningGameInfo2()overwolf.games.events.setRequiredFeatures()overwolf.games.launchers.getRunningLaunchersInfo()overwolf.games.launchers.events.setRequiredFeatures()
Best practices for creating effective recordings
The ERP can record all events and calls made while a recording session is running. However, it will not record things outside of the session time frame. Therefore, it is highly recommended that you carefully plan out your recordings to ensure that they cover your entire app flow.
Full session recordings
Full session recordings are the main type of recordings used. These are recordings made of a full game session, including the entire chain of events and calls from before a game was first launched, until after the last game was closed.
Recording examples:
- A full game session when a quick match was played, and then the game was closed.
- A full long game session, potentially spanning over several hours.
- A session where multiple full game sessions were done in succession, at times without even closing the game.
These recordings can be used to test general app flows making sure the app behaves as expected, from end-to-end.
Mid session recordings
Mid session recordings are an advanced recording type, typically made in the middle of a game session. They do not include the entire chain of events and calls that has led the app to the current state, but they do include a specific set of events and calls that are relevant at this point in your app flow.
Recording examples:
- A game round where one person took out the entire enemy team.
- A character select phase.
- A post-match phase.
These recordings can be used to test specific app edge cases, rather than entire flows. However, you must ensure the app is in a state where these recordings can reasonably happen before starting to play them.
Both full session and mid session recordings should be used as small Unit Tests for your app.